How to install PHP on Windows?
Install PHP directly on your Windows system without any issues. The most up-to-date beginner's step-by-step illustrated tutorial.
Why do you need PHP on your computer?
If you'd like to develop Laravel, Symfony or WordPress applications and websites, it's a good idea to have PHP on your machine.
Follow this always up-to-date beginner's guide on how to get up and running.
How to install PHP on a Windows machine?
Let's see what are the options to get PHP on Windows. Keep in mind we just care about PHP, and some PHP must-haves like Composer.
Step 1: Downloading PHP
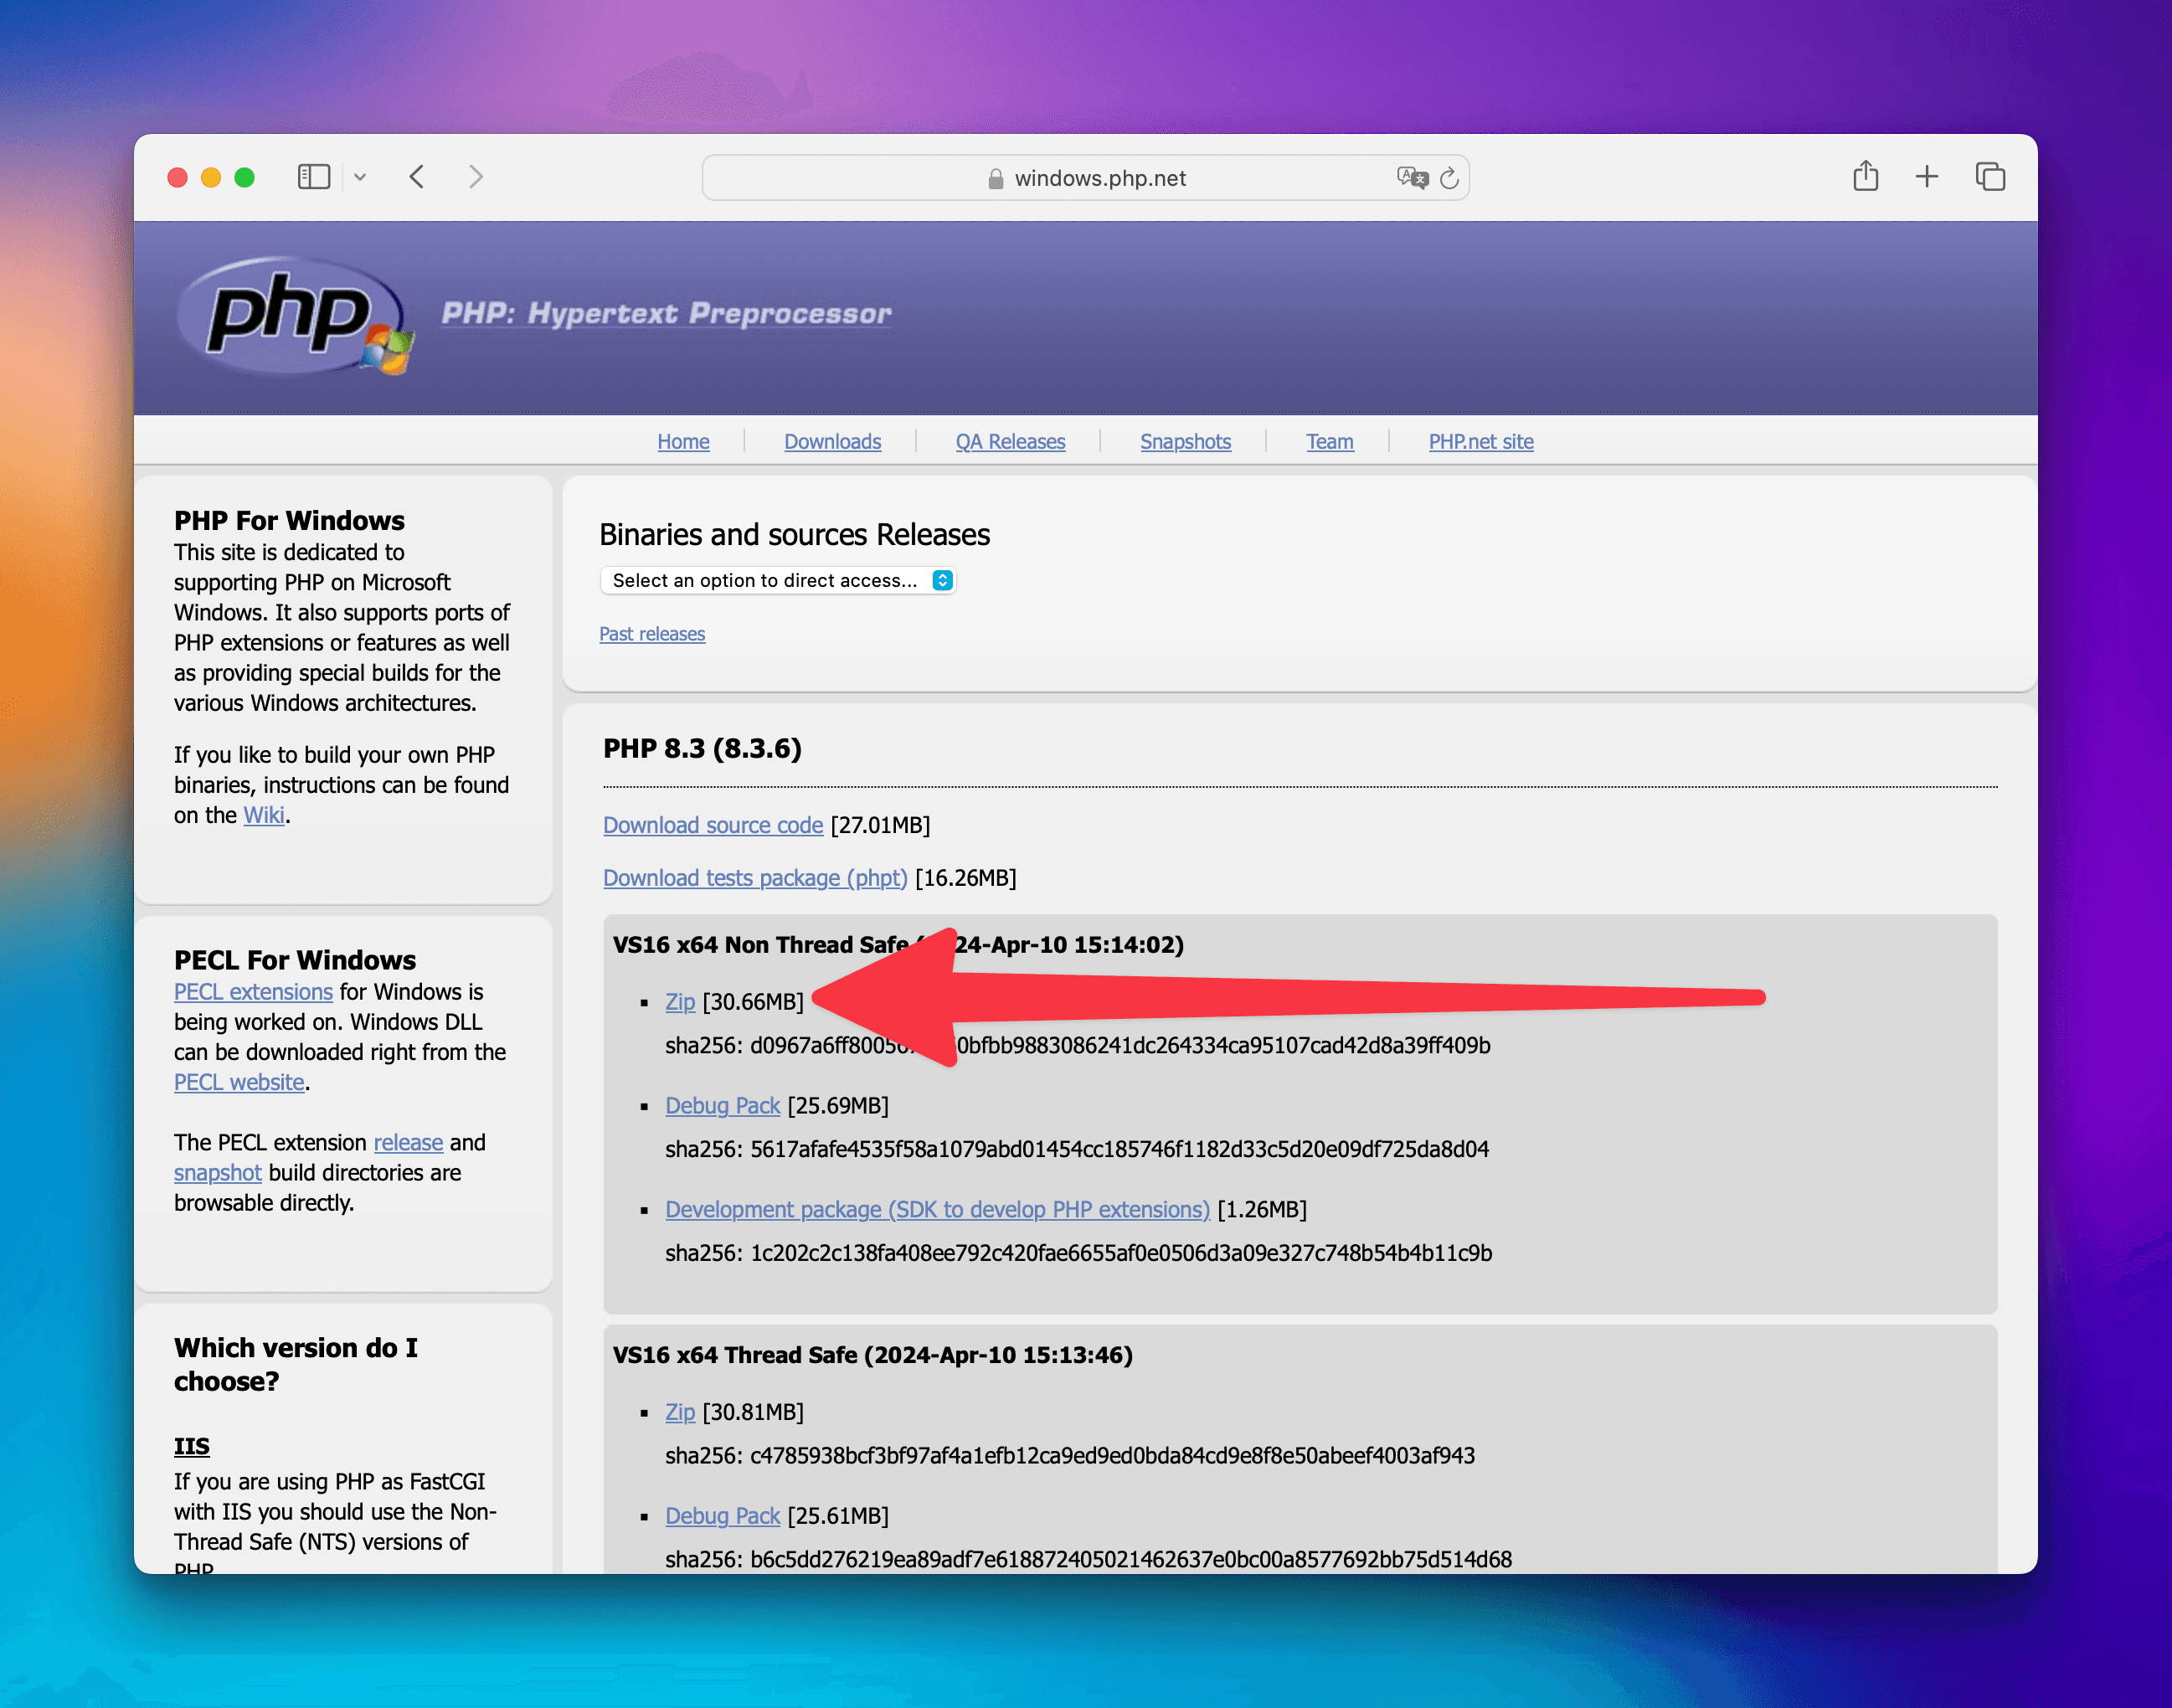
- Visit the PHP Downloads page for Windows and download the Non Thread Safe Version. Unless you have specific requirements grab the most recent version, as of today it's 8.3.

-
Extract the files using "Extract all" in Windows Explorer (don't need any 3rd party software to extract ZIP files anymore). I extract the contents into
C:\php8- but it's up to you. -
Click the Start menu and type
Terminal, then open theTerminalapp. Typephp -vinside it, and you should see a red error sayingThe term php is not recognized. If you see a version of PHP instead, and it's not php 8.3, it means you already have PHP installed!.

- If you already had PHP and it is up to date (anything less than 8.* is very out of date!) - you can keep the old version. Though, I highly recommend going for the most recent one.
Step 2: Telling Windows where to find PHP binary
So Windows won't know about PHP, you need to tell Windows what to do when you type the php command in the Terminal. Here's how:
- Open the Start menu and type "environment" (or your local language equivalent). Select the Edit the system environment variables menu.

- A window will open, select "Environment Variables":

-
Another window will open. From the list "User variables for...", select "Path" and click the "Edit..." button.
-
Another window will show up, hit the "New" button and type the directory where you've extracted your PHP files, for me it was
C:\php8. -
Select the directory you've just added on the list and click "Move Up" so it's the first element on the list.
-
Confirm with "OK" on every single window open.
-
Restart the
Terminalapp, and typephp -vagain. You should see the version of PHP you've just installed. -
Additionally type
php -i | findstr "php.ini"and it should sayC:\php8\php.ini, where it should show the folder where you've extracted your PHP files. This confirms 100% theTerminalis using the PHP we have just installed, not any other installation (if you had one before).
Step 3: Installing Composer - PHP dependency management tool
In 2024 you create PHP apps by using Composer. It's also the standard way to manage all libraries and frameworks, like Laravel of Symfony.
The installation for Windows is simple, just download and run the Composer installer.
What to do or learn next?
After getting PHP installed, it's time to put it to some use. You will certainly be interested to learn Laravel, the most popular PHP framework that will make you incredibly productive from day one through my video courses!